Stages
The "Stages" tab features the main project plan in the form of a tree-like structure of its content.
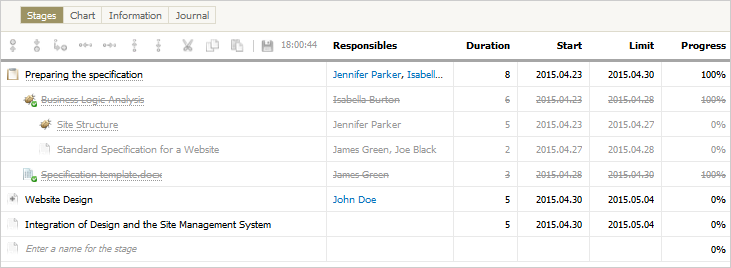
Each stage of the project is characterized by the following data:
- Responsibles — the users responsible for the execution of the stage.
- Start — date of the stage start.
- Limit — a planned date of stage completion.
- Duration — a planned duration of the project stage. The minimum allowed value is 1 day.
- Progress — the progress of stage completion as a percentage.
|
Creation and Layout of Stages
The simplest way to create a stage is to enter its name in the blank field labeled "Enter the name of the stage." Once you have entered the text, the stage is created and a new blank field appears below it. This is a convenient way to create a plan from scratch based on a on a ready draft.
Another way is useful when you need to add a stage inside an existing plan. The module provides a stage adjustment panel. All you need to do is to select the stage, relative to which a new one will be created, and click on one of the buttons:
 Add before — adds a new stage above the selected one.
 Add after — adds a new stage below the selected one.
 Add a child stage — adds a substage to the selected one.
From this panel you can also change the three structure if necessary. Use the following buttons:
 Shift left — shifts the selected stage to a higher level. All other stages from the same level will become its substages.
 Shift right — shifts the selected stage and all its substages. The shifted stage will become a substage to the above one.
 Move up — the selected stage and the above one exchange places.
 Move down — the selected stage and the below one exchange places.
Link Stages
The Projects module is closely connected with other TeamWox modules: Tasks, Service Desk, Documents and E-Mail. Any entry of these modules can be linked to a project stage.
There are several ways to bind tasks, requests and other entries. The first method is to insert a simple constant link to the entry in the stage name entry field.
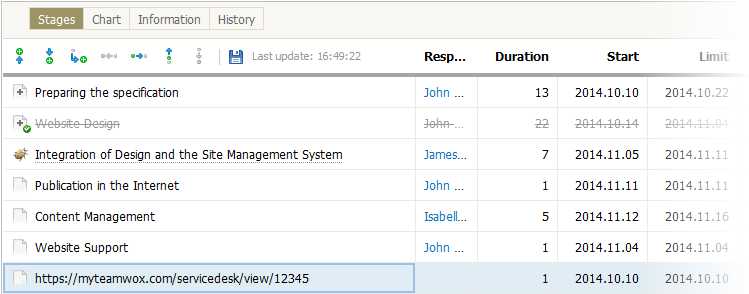
The stage name automatically becomes similar to the header of the entry the work is performed in, and an appropriate module icon appears near the name.
The second way to link an entry is using the search button  in the stage action menu. A click on it opens a search dialog.
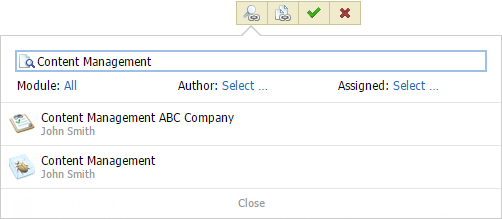
The search interface is simple and intuitive. Enter the name of the required entry in the search bar at the top of the window.
Additional fields are used for narrowing the search. You can select the module, author and assigned users.
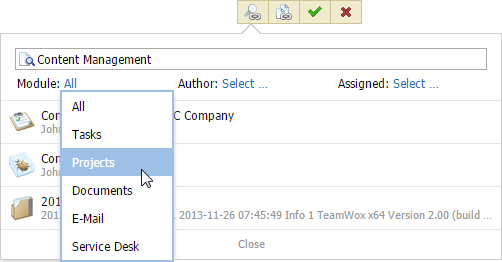
To select a specific module, click on . A click on it opens an additional list of modules:
In the "Author" field, you can select the author of the required entry. Click on to open the menu where you can select between your own entries ("My") and other users' entries ("Select..."). Click on "Select" to open the list of system users/groups, where you can select the author(s).
The last filter field is "Assigned". Click to open the list of system users/groups, where you can select assigned users for the required entry.
Search results are displayed after pressing the "Enter" key. To link an entry, click on its name in the list. Click "Close" to close the search dialog.
To delete a linked entry, click  .
.
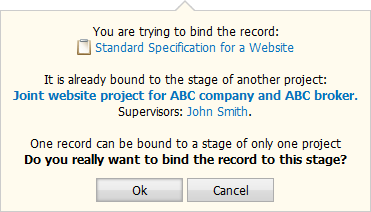
One entry can be linked to only one stage of the project. When you try to link it to a stage of another project, a message shows up:
- The title of the entry with the possibility to open a page to view it.
- The project to which the entry is linked with the possibility to open a page to view it.
- Project supervisors with the possibility to open their profile page.
Here you can select to cancel the action or to unbind the entry from another project stage and link it to the current one.
Adding a New Entry
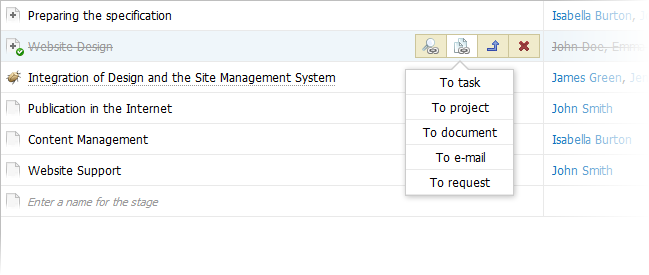
In addition to binding a stage to entries from other modules, an opposite action can be produced in the module. I.e. you can add a new entry to another module directly from the stage of the project. To do this, in the stage menu click on  "Add a new record" and select a required module in the menu.
Dates of linked entries are synchronized with the duration of stages and cannot be changed from the entry page. To edit dates, go to the project and edit the stage dates. |
Standard Stage Actions
Along with unique buttons of "Bind" and "Add", the menu also features standard purpose buttons:  Close,
  Restore and
  Delete.
The "Close" button closes the stage, which in turn means the closure of the bound entry in another module, if any. Th stage progress changes to 100%, the progress of the parent stage and the entire project increases proportionally, and the name of the stage is crossed out and its color changes to gray.
It should be noted that when a parent stage is closed, its child stages are not closed automatically. |
Sometimes you may need to go back to work with an already closed stage. In this cases use the "Restore" button. A click on it re-opens the stage, with the same progress and all the visual changes as they were before closing. The bound entry is also restored.
To delete an unnecessary, irrelevant or accidentally created stage, click "Delete".