- Welcome
- TeamWox Communicator
- Diagrams
- Editor
- Templates
- User Details
- Getting Started
- Browser Settings
- Calendar
- Calls
- Charts
- Exit
- File Viewers
- Filters
- Notifications
- Certificate Installation
- Interface
- List of Assigned
- Mind Map
- Permissions
- Search
- Status
- Google Translate
- Windows
- Home
- Tasks
- Documents
- Service Desk
- Chat
- Organizations
- Contacts
- Board
- Team
- Products
- Accounting
- E-Bank
- Search
- Calendar
- Telephony
- Administration
- Projects
Working with Filters
Notwithstanding the fact that we can only call 'filters' those located in the tabs of "Organizations", "Contacts" and "Products", the working with the tasks, for example, or with the categories of the board is very similar. It, first of all, concerns their location and the possibility to hide/open. The filters are always located on the left side of the window, no matter what tab you are currently at (except the "Home" tab). You can hide/show filters by pressing  (if the filters are closed, the arrow on this button changes its direction) located on the strip that separates filters from the list of organizations, contacts, etc. You can switch between filters by pressing with the left button of your mouse on their names.
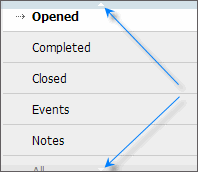
In case the list of filters does not fit the window, the scrolling buttons appear in the upper and lower parts of it. You can scroll the list by putting the cursor over them.

In the same manner, you can scroll the list of topics of the help file you are currently reading.
Some features of working with filters according to the modules should be noted:
- filters affect only the current folder if you work in the "Documents" module. If you choose the /Work/Managers/ folder in the "All" filter and pass to the "In hand" filter, you will see only the "in hand" documents contained in the "Managers" folder;
- modules "Organizations", "Contacts" and "E-Mail" allow you to create custom filters. Creation of filters in the "E-Mail" module differ essentially from the other two modules and will be described in the corresponding section.
Creating Filters in "Organizations" and "Contacts"
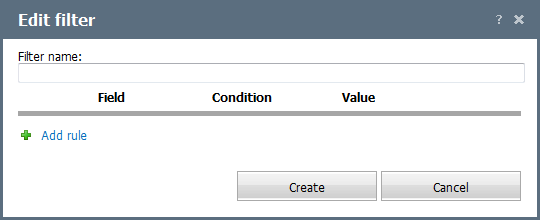
In order to create a filter, you should press the ![]() New filter button located under the list of filters already created. The window of editing a filter appears, as soon as you press this button:
New filter button located under the list of filters already created. The window of editing a filter appears, as soon as you press this button:

You should enter the filter name in the "Filter name" field. If you press the ![]() Add rule button, the following block appears:
Add rule button, the following block appears:

The following parameters are specified here:
- AND/OR — you should choose the filters condition ("AND", "OR") in the first field of the block.
- Field — you should choose the field, by which organizations/contacts will be selected for your filter. You can select this field in the list that opens if you press the arrow-like button at the end of the "Field". This list contains all the fields that can be filled out during creating a new organization/contact in TeamWox.
- Condition — you should choose a filtering condition in the "Condition" field. The possible choices according to the field chosen are: empty, filled, equal to, not equal to, starting from, containing.
- Value — if one of the last four noted conditions is chosen, you should type the desired word or phrase in the "Value" field. In other words, if you specify the "Country" field and the condition "Equal to", then you should enter the country name in the "Value" field (for example, "Australia").
Rules of a filter are executed sequentially. Rules can be grouped between the "OR" conditions. For example, to create a filter of organizations of the Client type from Russia or USA, and whose manager is John Smith, create the following set of rules:
|
In order to add a rule, you should press the "Add" button located to the right of the "Value" field. Once the rule has been added, its entry appears in the list:

You can edit or delete it by pressing the  or
or  buttons, respectively. These buttons appear, if you put the cursor over the entry of the created rule in the list. You can add another rule to the filter by pressing the "Add rule" button.
Once all the necessary rules have been added, you should press the "Create" button to save the filter. If you want to cancel the operation, you should press the "Cancel" button. Another way to do it is to close the "Edit filter" window by pressing the  button located in the upper-right corner of the window.